


How to Polish Crystal Glassware Properly at Home?
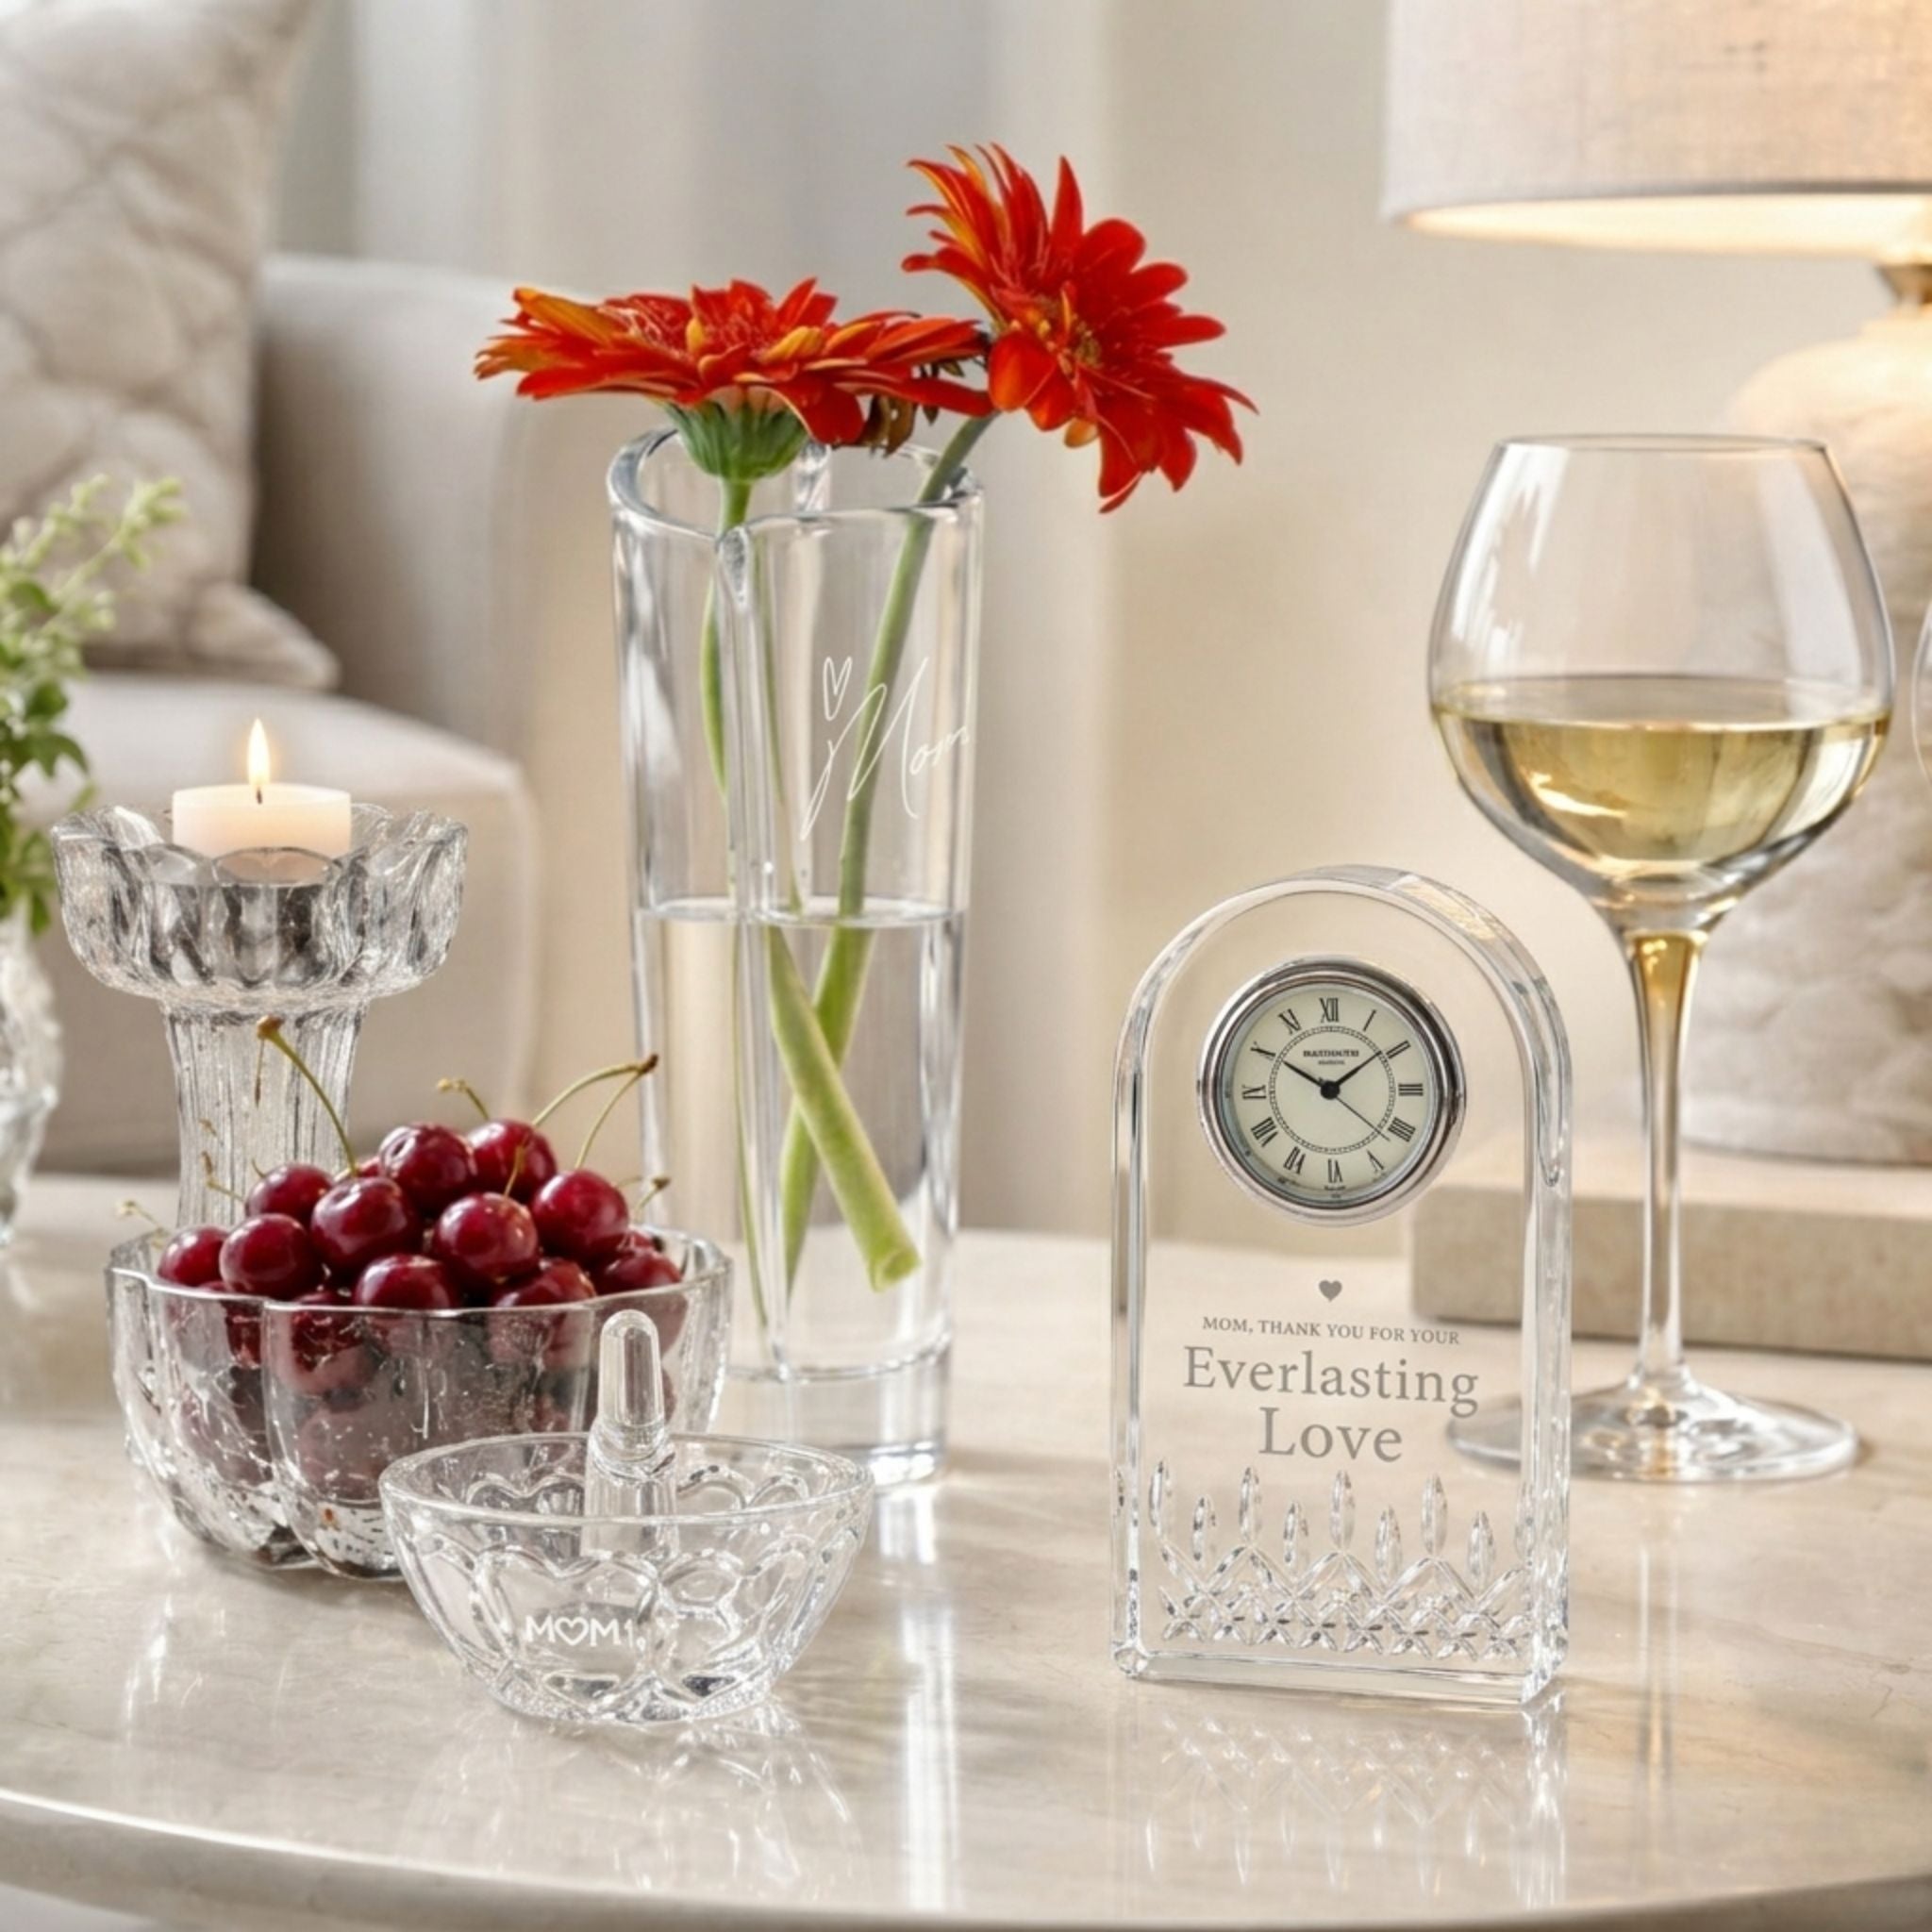
Crystal glassware possesses a luminous quality that transcends mere function. Each piece captures light, refracts it into prismatic brilliance, and transforms ordinary moments into occasions worthy of remembrance. Whether you're caring for vintage stemware inherited from beloved grandparents, contemporary pieces from master glassmakers, or personalized crystal engraved with cherished memories, proper polishing ensures these treasures maintain the dazzling clarity that makes them so captivating.
At Crystal House, we've devoted ourselves to the art of crystal since 1999, transforming premium crystal into heirloom-quality keepsakes through our signature sand-etched engraving. We understand intimately that exceptional crystal demands exceptional care. Learning how to polish crystal glassware properly preserves not only the material's brilliant transparency but also the craftsmanship, artistry, and emotional significance these pieces embody.
In this comprehensive guide, we'll share expert techniques for crystal glass polishing from routine maintenance to restoring vintage pieces using methods that honor delicate surfaces while achieving the spectacular shine that defines premium crystal. Whether you're preparing stemware for an elegant dinner, displaying personalized pieces that tell your story, or preserving collections from distinguished makers like Nambe, Kosta Boda, Vista Alegre, and Orrefors, these insights will help you maintain the timeless elegance your crystal deserves.
Why Proper Polishing Matters for Crystal Glassware
The brilliance of crystal represents far more than cleanliness; it reflects the material's unique molecular structure, the artisan's skill, and the care invested in preservation. Crystal's characteristic sparkle comes from its lead oxide or mineral content, which creates exceptional light refraction. However, this same composition makes crystal vulnerable to improper handling, harsh chemicals, and abrasive polishing that can permanently diminish its optical perfection.
Proper polishing maintains the clarity that distinguishes crystal from ordinary glass. Even microscopic scratches, chemical residue, or mineral deposits scatter light rather than allowing clean refraction, creating dullness that obscures the crystal's natural brilliance. Over time, inadequate care compounds these issues, which begin as slight haziness progresses to obvious cloudiness that no amount of subsequent polishing can fully reverse. Understanding how to make crystal glassware shine through appropriate techniques prevents this deterioration while preserving the pristine transparency that makes crystal so mesmerizing.
Beyond optical considerations, there's the matter of honoring craftsmanship. Crystal glassware represents significant artistry, whether in hand-blown forms, intricate cut patterns, or the deep, sculpted engravings we create at Crystal House through our sand-etching process. Master artisans invest extraordinary skill and time into each piece, and proper polishing respects this dedication by maintaining the surfaces that showcase their work. A perfectly polished stemware set, a brilliantly clear engraved bowl, or a sparkling vase demonstrates appreciation for the artistry involved while ensuring details remain visible and celebrated.
There's also profound emotional significance in crystal care. Many pieces carry memories, wedding gifts that witnessed decades of celebrations, heirloom stemware that graced countless family gatherings, and personalized crystal commemorating life's pivotal moments. When you polish these treasures, you're not merely maintaining objects but honoring the stories they hold and the connections they represent. Proper care ensures these pieces remain beautiful enough to continue their roles in creating memories for generations to come.
Practical preservation matters equally. Crystal represents investment, whether financial or sentimental. Improper polishing through harsh chemicals, abrasive materials, or extreme temperatures can cause irreversible damage: etching that clouds surfaces permanently, stress fractures from thermal shock, or scratches that compromise both clarity and value. Understanding correct polishing methods protects your investment while ensuring longevity that matches the crystal's inherent durability.
Finally, there's the simple pleasure of beauty. Properly polished crystal elevates any space it occupies, whether displayed in cabinets, arranged on dining tables, or showcased on bar carts. The play of light through flawless crystal creates ambiance, adds elegance, and transforms environments from ordinary to extraordinary. This aesthetic impact depends entirely on maintaining the pristine surfaces that allow the crystal's natural brilliance to shine unobstructed.

Step-by-Step Method: How to Polish Crystal Glassware at Home
Achieving museum-quality shine on crystal glassware requires understanding both fundamental principles and refined techniques. The following comprehensive approach ensures brilliant results while protecting delicate surfaces and preserving the artistry embodied in each piece.
Start with a Gentle Pre-Clean
Polishing achieves optimal results only on a properly cleaned crystal. Any residue, dust, or grime remaining on surfaces will be distributed rather than removed during polishing, potentially causing scratches or streaking. Begin with a thorough yet gentle washing before attempting to polish.
Fill a basin with warm, never hot, water and add just a few drops of mild, pH-neutral dish soap. Avoid heavily fragranced, colored, or moisturizing soaps, as these leave residue that clouds crystal. The water should feel comfortably warm to the touch but nowhere near hot, as extreme temperatures can cause thermal shock leading to cracks or permanent cloudiness in delicate crystal.
Immerse one piece at a time, never stacking or allowing pieces to contact each other during washing. The risk of chipping or cracking multiplies when crystal items touch, particularly in soapy water, where surfaces become slippery. Using your hands or an extremely soft cloth, gently wash all surfaces, paying particular attention to areas that contact lips (rims of stemware), bases where dust accumulates, and any decorative elements or engravings where residue hides.
For crystal featuring personalized engraving like the deep, sculpted designs created through our sand-etching process, use extra care around these details. Ensure soapy water reaches into engraved areas without aggressive scrubbing that could stress the surrounding crystal. A very soft brush designed specifically for delicate surfaces can help clean intricate patterns without damage.
Rinse each piece thoroughly under warm running water, continuing until no soap residue remains and no slippery feeling persists on the surface. Inadequate rinsing leaves film that defeats the purpose of cleaning and interferes with subsequent polishing. Typically, a continuous thirty-second rinse under gentle running water ensures complete soap removal.
After rinsing, immediately dry each piece using ultra-soft, lint-free microfiber cloths. Never allow crystal to air dry, as this permits water, especially hard water, to evaporate and leave mineral deposits that create spots and cloudiness. Pat gently but thoroughly, ensuring all moisture is removed from surfaces, bases, and any decorative elements.
This pre-cleaning establishes the foundation for effective polishing. Only on a perfectly clean, dry crystal can polishing reveal the spectacular brilliance that defines premium pieces.
Use a Soft Microfiber Cloth for Polishing
The cloth you select for polishing profoundly impacts results. Only ultra-soft, lint-free microfiber cloths specifically designed for delicate surfaces should contact your crystal. These feature extremely fine fibers that glide across crystal without causing microscopic scratches that accumulate into visible cloudiness. Regular cotton towels, paper products, or general-purpose cleaning cloths contain fibers too coarse for crystal's delicate surfaces.
Invest in high-quality microfiber cloths designated exclusively for crystal care. Wash them separately from other laundry to prevent them from picking up debris, and replace them when they show any signs of wear, roughness, or lint accumulation. Having multiple clean cloths available during polishing sessions ensures you're always working with pristine fabric.
Hold your crystal piece securely but gently. For stemware, cup the bowl in one hand while polishing with the other; never hold by the stem alone, as this can cause stress fractures. For bowls, vases, or other pieces, support the base or body firmly while polishing the upper surfaces. This secure grip prevents dropping while distributing pressure safely across the piece.
Begin polishing using small, gentle circular motions. Work in sections, completing one area before moving to the next. The circular motion creates subtle friction that enhances crystal's natural luster while the cloth lifts any remaining microscopic particles. Apply minimal pressure, let the cloth's quality and the polishing motion do the work rather than relying on force that could scratch or stress the crystal.
As you polish, periodically inspect your cloth. If it becomes soiled or damp, switch to a fresh one. Continuing with a dirty or wet cloth reduces polishing effectiveness and can actually transfer residue back onto crystal surfaces you've already finished.
For the best way to polish crystal glasses, maintain consistent, gentle pressure throughout. Avoid pressing harder on stubborn spots. If an area doesn't respond to gentle polishing, it likely needs additional cleaning rather than more aggressive polishing pressure.
The warmth from your hands during this process contributes to achieving exceptional shine. Body heat very slightly warms the crystal, which, combined with the microfiber cloth's friction, creates ideal conditions for revealing brilliant clarity. This time-honored technique, used by professional crystal handlers and discerning collectors, delivers results that mechanical polishing simply cannot match.
How to Polish Crystal Glassware Using Vinegar
White vinegar serves as one of the most effective natural polishing agents for crystal, offering both cleaning and shine-enhancing properties without introducing harsh chemicals. Its mild acidity removes residual soap film, dissolves light mineral deposits, and creates spectacular shine when used correctly.
Create a diluted vinegar solution using equal parts white vinegar and distilled water. If your crystal shows no particular problems, no cloudiness, spots, or residue, this diluted version provides gentle yet effective polishing enhancement. For a crystal with visible haze or mineral deposits, undiluted white vinegar proves more effective, though it requires more thorough rinsing afterward.
Dampen a clean, soft microfiber cloth with your vinegar solution; the cloth should be barely damp, not wet. Excess liquid can pool in bases or decorative elements, creating new water spots you'll then need to address. Wring the cloth thoroughly after dampening, ensuring it's just moist enough to transfer a thin vinegar film to crystal surfaces.
Wipe all crystal surfaces with this dampened cloth, working in smooth, overlapping strokes that ensure complete coverage. The vinegar removes any remaining soap film, lifts light mineral deposits, and cuts through oils from handling. To polish crystal glassware using vinegar effectively, ensure even coverage without oversaturating any area.
Immediately after applying vinegar, before it dries, follow with a completely dry microfiber cloth. Buff vigorously in circular motions, creating friction that enhances shine while removing the vinegar before it can leave its own residue. This two-step process of applying diluted vinegar followed by immediate dry buffing delivers extraordinary brilliance and clarity.
The vinegar method works beautifully for routine polishing and particularly excels at removing the subtle haziness that develops from repeated handling or environmental dust accumulation. It's gentle enough for frequent use weekly or even after each use for pieces in regular rotation, yet effective enough to maintain pristine clarity indefinitely.
For pieces requiring more intensive treatment, allow undiluted vinegar to sit on affected areas for two to three minutes before buffing. This extended contact time permits the acetic acid to dissolve more stubborn deposits. However, always follow with thorough rinsing using distilled water and complete drying to prevent vinegar itself from leaving residue.
This technique proves invaluable for how to clean and polish crystal wine glasses before entertaining, as it combines cleaning and polishing in one efficient process while using only natural, readily available ingredients.
How to Remove Haze or Cloudiness from Crystal Glass
Cloudiness or haze on crystal typically results from mineral deposits, soap film, or accumulated oils. This diminished transparency obscures the crystal's brilliance and can give even valuable pieces an appearance of neglect. Fortunately, targeted approaches effectively restore clarity to clouded crystal.
Vinegar Soak Method: For overall haziness or cloudiness, fill a basin with equal parts white vinegar and warm water. Submerge affected pieces completely, ensuring the solution contacts all clouded surfaces. Allow them to soak for one to two hours, or up to four hours for severe cloudiness. The acetic acid gradually dissolves mineral deposits and soap buildup while breaking down oils. After soaking, rinse thoroughly with warm water followed by distilled water, then dry and polish immediately with microfiber cloths.
Lemon Juice Treatment: Fresh lemon juice provides natural citric acid that works similarly to vinegar but offers a more pleasant scent. For localized haze, rub a halved lemon directly on affected areas, squeezing gently to release juice. Allow the juice to sit for five to ten minutes, then rinse thoroughly and polish dry. For broader treatment, add the juice of two to three lemons to warm water, soak pieces for thirty to sixty minutes, then rinse and polish.
Baking Soda Paste: For stubborn cloudiness that resists liquid treatments, create a thick paste using baking soda and minimal water to achieve a spreadable consistency. Using your fingertip or a very soft cloth, apply this paste to clouded areas. Rub in extremely gentle circular motions, the mild alkalinity neutralizes acidic residues while the paste provides just enough gentle abrasion to lift deposits without scratching. Rinse thoroughly and polish dry. This method proves particularly effective for polishing cloudy crystal glass with visible deposits or rings.
Denture Tablet Solution: These effervescent cleaners contain oxygen-releasing compounds designed to remove stains and residue from delicate surfaces. Fill a basin with warm water, add two to three denture cleaning tablets per piece, and allow the fizzing action to work for thirty minutes to one hour. This gentle yet effective treatment reaches into decorative cuts and patterns while addressing overall haziness. Rinse thoroughly and polish dry for spectacular results.
Steam Method: For light haziness, steam provides gentle yet effective cleaning. Bring water to a boil in a kettle, then hold your crystal piece in the rising steam for ten to fifteen seconds, far enough away to avoid extreme heat but close enough that condensation forms on the surface. Immediately wipe with a clean, dry microfiber cloth. The condensation lifts haze-causing particles while the warmth facilitates polishing. This technique works beautifully for routine maintenance between deeper cleanings.
Commercial Crystal Cleaners: For severely hazed crystal that resists home remedies, specialty crystal cleaning solutions designed specifically for lead crystal may be necessary. Follow product instructions meticulously, rinse exhaustively, and polish thoroughly. Reserve these stronger options for cases where gentler methods have proven insufficient.
Addressing Permanent Cloudiness: Sometimes haziness proves permanent, the result of internal chemical deterioration (sick glass syndrome) or etching from past harsh chemical exposure. If cloudiness persists after thorough treatment with multiple methods, it may be irreversible. In these cases, professional restoration consultation can determine whether remediation is possible or if the cloudiness has become a permanent characteristic of the piece.
Understanding how to remove haze from crystal glasses ensures even neglected pieces can be restored to brilliant clarity, proving that patient, appropriate treatment can reverse what appears to be permanent damage.
How to Polish Etched or Sand-Etched Crystal
Crystal featuring etched designs, cut patterns, or engraved details requires specialized polishing attention. These surface variations create areas where residue accumulates and where improper technique can cause damage. At Crystal House, we create deep, sculpted sand-etched engravings that transform crystal into personalized masterpieces, and we understand these details demand particular care.
Understanding Etched Surfaces: Etching, whether acid-etched, sand-etched, or mechanically engraved, creates texture by removing microscopic amounts of crystal surface. These textured areas catch light differently than smooth crystal, creating the contrast that makes designs visible. However, these same recessed areas trap dust, residue, and moisture more readily than smooth surfaces, requiring thorough yet gentle cleaning before polishing.
Pre-Polish Cleaning for Etched Areas: Before polishing, ensure engraved or etched areas are completely clean. Use a very soft brush, like those designed for infant care or delicate makeup application, to gently clean within etched details. Dip the brush in warm, soapy water and carefully work it into recessed areas, loosening any accumulated residue. Rinse thoroughly, ensuring all soap is removed from these detailed areas where it can hide.
Polishing Technique for Etched Crystal: When polishing etched surfaces, use slightly more pressure than you would on smooth crystal, but only slightly. The goal is to allow microfiber cloth fibers to reach into recessed areas without aggressive rubbing that could stress the crystal around the etching. Work in small circular motions that follow the contours of the design.
To polish etched crystal glassware effectively, ensure your polishing cloth is completely dry. Dampness in etched areas can dry into visible spots that detract from the design's clarity. If using vinegar polish, apply it only to smooth areas, carefully wiping around etched sections. For the etched portions, use only dry buffing to avoid moisture accumulation in recessed details.
Maintaining Design Visibility: Part of polishing etched crystal involves ensuring the contrast between smooth and textured areas remains sharp. If residue fills etched areas, the design becomes less visible. Regular gentle cleaning with soft brushes prevents this buildup, while careful polishing of surrounding smooth areas maximizes the light contrast that makes engravings stand out beautifully.
Special Consideration for Sand-Etched Designs: Our signature sand-etching process creates remarkably deep, sculptural engravings that capture photographs and messages with extraordinary detail. These deeper engravings prove somewhat more forgiving during polishing than shallow etching, as they're less likely to accumulate residue. However, they still benefit from occasional gentle brush cleaning followed by careful dry polishing that enhances surrounding smooth areas without disturbing the etched design.
Avoiding Common Mistakes: Never use abrasive cleaners, harsh chemicals, or aggressive scrubbing on etched crystal. The textured surfaces created by etching can trap abrasive particles, leading to accelerated wear. Similarly, avoid ultrasonic cleaners for engraved pieces, as vibrations can stress the crystal around detailed work.
Enhancement Through Proper Lighting: Once polished, display etched crystal where lighting enhances rather than obscures the design. Angled lighting creates shadows in etched areas that increase visibility and dramatic effect. Proper polishing combined with strategic lighting transforms engraved pieces into stunning focal points that honor both the crystal's quality and the artistry of the design.
Understanding these specialized techniques for how to polish etched crystal glassware ensures that pieces featuring personalized designs, decorative patterns, or intricate cuts maintain both their brilliant clarity and the visibility of details that make them unique.
How to Restore Shine to Old or Vintage Crystal
Vintage crystal carries particular significance; it represents history, connects us to previous generations, and often embodies craftsmanship techniques no longer commonly practiced. Restoring these treasured pieces to brilliant clarity requires patience, gentle methods, and respect for their age and potential fragility.
Initial Assessment: Before attempting restoration, examine vintage pieces carefully in strong natural light. Look for structural issues, hairline cracks, chips, and areas of weakness that might be stressed by even gentle cleaning. Check for signs of sick glass syndrome (permanent internal cloudiness from chemical deterioration) that won't respond to polishing. If you discover structural problems or if the piece holds significant monetary or sentimental value, consider a professional conservation assessment before proceeding with home restoration.
Extended Gentle Soaking: For vintage crystal dulled by decades of accumulated residue, how to restore shine to old crystal glass begins with extended soaking in mild solutions rather than aggressive polishing. Fill a basin with warm water and white vinegar (equal parts) and submerge pieces completely. Allow them to soak for four to six hours or even overnight. This extended contact time permits gentle chemical action to dissolve deposits without mechanical stress on potentially fragile crystal.
Temperature Caution: Vintage crystal has experienced countless thermal cycles over decades of expansion and contraction that may have created internal stress invisible to the eye. Never subject old crystal to temperature extremes or sudden changes. Ensure all water remains comfortably warm, transition gradually between temperatures, and never use hot water or expose vintage pieces to rapid temperature shifts that could cause catastrophic cracking.
Gentle Polish Application: After thorough soaking and rinsing, polish vintage crystal using the softest possible microfiber cloths and minimal pressure. Work slowly and methodically, allowing the cloth quality and technique to achieve shine rather than relying on pressure that could stress weakened crystal. For particularly delicate pieces, consider using silk cloths, which offer even gentler polishing than microfiber.
Multiple Light Sessions: Rather than one intensive restoration session, consider multiple gentle polishing sessions spread over days or weeks. This approach achieves gradual improvement without risking stress to fragile pieces. Each session might involve light polishing for just five to ten minutes, allowing the crystal to "rest" between treatments.
Addressing Permanent Changes: Sometimes vintage crystal displays characteristics that no polishing will remove, such as slight yellowing from age, minute surface etching from decades of use, or internal cloudiness from chemical deterioration. Rather than viewing these as flaws requiring correction, consider embracing them as patina, visible evidence of history and authenticity. These characteristics often add rather than detract from vintage pieces' appeal, telling stories of the decades they've witnessed.
Restoration of Lost Brilliance: For vintage crystal that simply appears dull rather than damaged, the vinegar polish method often works wonders. Apply diluted vinegar with a barely damp cloth, immediately buff dry, then follow with a second dry buffing using a clean cloth. This two-stage polishing frequently reveals brilliance hidden beneath decades of accumulated film, transforming seemingly hopeless pieces into stunning examples of crystal clarity.
Preserving Historical Details: Many vintage pieces feature gilded edges, hand-painted details, or decorative elements that could be damaged by overly aggressive polishing. Around these features, use only dry buffing with extreme gentleness. If gilt or paint shows signs of flaking or loosening, discontinue polishing those areas entirely; preserving what remains takes precedence over achieving uniform shine.
Professional Consultation: For valuable antique crystal, pieces with significant family history, or items showing signs of serious deterioration, professional conservation expertise proves worthwhile. Specialists possess knowledge, tools, and solutions that can address challenges beyond home capability while preserving historical and monetary value.
Vintage crystal connects us to those who treasured it before us, perhaps grandparents who celebrated with these pieces, or ancestors whose refined taste led them to acquire exceptional crystal. Restoring these pieces with knowledge, gentleness, and reverence honors both their material beauty and their role as family treasures spanning generations.

How to Polish Crystal Stemware Without Scratching
Crystal stemware, wine glasses, champagne flutes, and cocktail glasses combine remarkable beauty with notable fragility. The delicate stems, thin bowls, and graceful forms that make stemware so elegant also make it vulnerable during polishing. Proper technique prevents scratches while achieving the brilliant clarity these pieces deserve.
Proper Hand Position: A correct grip is essential for how to polish crystal stemware without scratching. Never hold stemware solely by the stem, as this concentrates stress on the most fragile component and can cause breakage. Instead, cup the bowl gently in one hand while polishing with the other. This distributes pressure across the stronger bowl portion while providing secure control that prevents dropping.
When polishing the stem itself, support the bowl from underneath or rest it in your lap on a folded towel. This prevents twisting force on the stem; even slight rotational pressure during polishing can snap delicate stems. Work around the stem rather than rotating the glass, keeping your polishing motion linear along the stem's length.
Pressure Control: The key to scratch-free polishing lies in using minimal pressure. Crystal stemware's thin walls don't require aggressive polishing; gentle buffing with quality microfiber cloths achieves spectacular results. If you're pressing hard enough to flex the bowl or bend the stem noticeably, you're using excessive force that risks both scratching and breakage.
Think of polishing as caressing rather than scrubbing. Let the cloth's quality, the polishing motion, and patience achieve shine rather than relying on pressure. Multiple gentle passes prove more effective and safer than one aggressive polishing session.
Cloth Selection and Preparation: Use only the softest, highest-quality microfiber cloths for stemware. The thinner walls and more delicate surfaces of stemware make cloth quality even more critical than for heavier crystal pieces. Ensure cloths are completely clean, free of any grit or debris that could scratch, and perfectly dry unless specifically using the vinegar polish method.
Interior Polishing Technique: Polishing stemware interiors requires particular care. Roll a microfiber cloth around your fingers, creating a soft, padded polishing surface. Insert this into the bowl carefully, ensuring you're not forcing cloth into spaces too small. Polish interior surfaces using gentle circular motions, working from bottom to rim.
Never twist stemware around a stationary cloth held inside; this twisting motion can snap stems. Instead, move your cloth-wrapped fingers while keeping the glass stable. For narrow flutes or glasses where your fingers don't fit, use a specialized stemware polishing tool, essentially a soft cloth wrapped around a handle designed to reach without forcing.
Rim Care: The rim, where lips contact the glass, deserves special attention during polishing. This thinnest part of stemware is most vulnerable to chipping yet most important for the drinking experience. Polish rims with feather-light pressure using small, careful motions that follow the rim's curve. Ensure no grit exists on your cloth before polishing this delicate edge.
Base Stability: When setting stemware down during polishing, ensure surfaces are soft and stable. Place a folded towel on your work surface to provide cushioning and prevent slipping. Never set stemware on hard surfaces where it could tip or slide during handling.
Sequential Polishing: Polish stemware in stages rather than trying to complete each piece in one handling. First, polish all bowls, then return to polish all stems, and finally address all bases. This staged approach reduces handling time per piece, minimizing breakage risk while maintaining focus on each specific area's requirements.
Temperature Awareness: Ensure your hands aren't too cold when polishing stemware, as cold hands against room-temperature crystal can create minor thermal stress. Similarly, if stemware has been in a cool cabinet, allow it to reach room temperature before polishing. These temperature considerations prevent stress that could lead to cracking in delicate pieces.
By following these careful techniques, you'll maintain your stemware's pristine clarity and brilliant shine while protecting against the scratches and breakage that can result from improper handling.
DIY Home Methods to Polish Crystal Glasses
Professional-quality crystal polishing requires neither professional services nor expensive products. Your home contains everything necessary for achieving brilliant results using safe, effective, economical methods that honor crystal's delicate nature while delivering spectacular shine.
Warm Water Polish: Sometimes simplicity suffices beautifully. For routine polishing of a clean crystal, slightly dampen a microfiber cloth with warm distilled water, wipe all surfaces, then immediately buff dry with a second cloth. This basic technique removes dust and light film while enhancing natural brilliance. It's gentle enough for daily use and requires only water and proper cloths.
White Vinegar Versatility: As discussed throughout this guide, white vinegar proves indispensable for DIY method to polish crystal glasses. Use it diluted with distilled water for routine shine enhancement, or undiluted for removing haze and restoring clarity. At pennies per polishing session, vinegar delivers professional results without chemicals or environmental concerns.
Steam Polish Method: Harness steam's cleaning and polishing power using a simple kettle. Bring water to a boil, then hold your crystal piece in rising steam for ten to fifteen seconds; close enough for condensation to form but far enough to avoid extreme heat. Immediately wipe with a clean, dry microfiber cloth. The steam softens any residue while the subsequent polishing captures brilliant clarity. This method works beautifully for routine maintenance between deeper cleanings.
Lemon Shine Enhancement: Fresh lemon juice offers natural polishing power plus a pleasant scent. Add juice from one lemon to a cup of distilled water, dampen a microfiber cloth with this solution, wipe crystal surfaces, and immediately buff dry. The citric acid cuts through residue while enhancing shine, creating results that rival commercial crystal polishes.
Newspaper Final Buff: After cleaning and initial polishing, give the crystal a final buff using clean newspaper. Crumple black-and-white newsprint (avoid colored sections) into a soft ball and buff dried crystal surfaces. The paper's mild texture lifts microscopic particles while its structure prevents lint transfer, an old-fashioned technique that still delivers impressive results at zero cost.
Alcohol Final Polish: For absolutely spotless clarity, perform a final polish using a tiny amount of vodka or rubbing alcohol. Dampen a microfiber cloth with alcohol barely damp, not wet wipe all surfaces, then immediately buff with a dry cloth. Alcohol evaporates almost instantly while carrying away residual moisture, leaving nothing but pristine clarity without water spots.
Coffee Filter Polish: These lint-free papers excel at final polishing. After your crystal appears dry and polished, give it a final buff with coffee filters to achieve streak-free perfection. The filters' smooth texture polishes without scratching, while their structure eliminates lint concerns that plague traditional cloths.
Sunshine Sparkle Enhancement: On mild days, give a cleaned crystal a "sunshine bath." Place pieces in indirect natural sunlight for thirty minutes to one hour. The gentle warmth evaporates any lingering moisture while UV light naturally sanitizes. Avoid direct intense sunlight that could create hot spots. Dappled shade proves ideal. After the sunshine exposure, give pieces a final buff with dry microfiber cloths for extraordinary brilliance.
Preventive Polishing Routine: The most effective DIY approach involves establishing regular, gentle polishing habits. Wipe crystal pieces with slightly damp microfiber cloths weekly, even when they appear clean. This prevents dust and film accumulation that dulls shine over time. Monthly, perform the vinegar polish method for enhanced clarity. These minute-long habits maintain continuous brilliance without requiring intensive restoration sessions.
Ice Water Rinse: For an extra-clear final rinse after washing crystal, prepare a basin of ice water mixed with distilled water. After washing and rinsing, give pieces a quick dip in this ice water, then immediately dry and polish. The cold water causes the crystal to contract slightly, creating an exceptionally smooth surface that polishes to remarkable brilliance.
These DIY methods prove that exceptional crystal polishing requires neither complicated procedures nor costly products, just knowledge, quality microfiber cloths, and readily available household items used thoughtfully.

How to Polish Crystal Bowls and Vases
Larger crystal pieces, bowls, vases, centerpieces present unique polishing considerations due to their size, weight, and often elaborate designs. These statement pieces typically serve as focal points in home décor, making their brilliant clarity particularly important while their substantial size demands adapted techniques.
Secure Positioning: Unlike stemware that you can hold comfortably while polishing, larger pieces often require setting on surfaces during polishing. Prepare your work area by laying thick, soft towels on a stable surface. This padding prevents scratching the piece's base while providing cushioning against accidental impacts. Ensure the surface is level and that the piece sits stably before beginning polishing.
Sectional Polishing Approach: To polish crystal bowls and vases effectively, work in manageable sections rather than attempting to polish entire pieces in one continuous motion. Divide the piece mentally into quadrants or sections, and complete one thoroughly before moving to the next. This systematic approach ensures uniform results while preventing fatigue that could lead to dropped pieces or compromised technique.
Interior Access for Vases: Polishing narrow-necked vase interiors requires specialized approaches. For accessible interiors, roll a microfiber cloth around your hand or a soft-bristled bottle brush, creating a padded polishing tool. Insert carefully and work in gentle motions that don't stress narrow necks. For interiors too narrow for hand access, use long-handled specialized vase polishing tools or rely on the steam method, hold the vase over steam to create interior condensation, then invert to allow moisture to drain while gently shaking to distribute remaining droplets, which will evaporate, leaving naturally polished surfaces.
Bowl Interior Polishing: Large bowl interiors provide ample access for direct hand polishing. Use a fresh microfiber cloth for interiors, as exterior polishing may have transferred dust or residue to your original cloth. Work from center to rim in overlapping circular motions, ensuring complete coverage without missing areas that would show as dull patches against polished sections.
Handling Heavy Pieces: Crystal bowls and vases can be surprisingly heavy. When moving them during polishing, always use both hands, supporting from the bottom rather than gripping the sides or decorative elements. Never lift by the narrow necks, handles, or delicate protrusions. If a piece is too heavy or awkward for safe handling, polish it where it sits rather than risking dropping it during repositioning.
Cut Crystal Considerations: Many bowls and vases feature elaborate cut patterns and intricate geometric designs that create spectacular light effects. These cuts require careful polishing that reaches into crevices without stressing the crystal. Use slightly more pressure than on smooth surfaces to allow cloth fibers to reach into cuts, but maintain gentleness to avoid stressing ridges between cuts. Work in directions that follow cut patterns rather than against them.
Rim and Edge Care: Large bowl rims often feature decorative cuts or delicate edges. Polish these areas with particular care, using light pressure and small motions that follow the rim's contour. Check frequently for any caught threads from your polishing cloth; these should be removed immediately rather than pulled, which could stress delicate edges.
Base Polishing: Don't neglect bases during polishing; these often-overlooked areas collect dust and show fingerprints prominently. Turn pieces carefully onto their sides (supported on soft towels) to access bases fully. Polish thoroughly, as bases are often the most visible part when pieces sit on shelves or tables.
Display Preparation: For pieces destined for prominent display, perform final polishing under lighting conditions similar to where they'll sit. This allows you to see exactly how the piece will look in its display location and address any spots or streaks that might not be visible under different lighting. Rotate the piece during this final check, viewing from multiple angles to ensure uniform brilliance.
Decorative Element Care: Some bowls and vases feature applied decorations, gilt edges, enamel details, and attached components. Around these elements, use only dry, gentle buffing. Avoid vinegar or acidic polishes on gilded areas, as these can damage metal finishes. If decorative elements show tarnishing separate from crystal cloudiness, they may require specialized metal polish used carefully on those elements only, avoiding contact with crystal surfaces.
Understanding these specialized techniques ensures larger crystal pieces maintain the spectacular clarity and brilliant shine that makes them worthy centerpieces, commanding attention and admiration.
How to Polish Crystal Glassware for Display
Display pieces, whether arranged in cabinets, showcased on shelving, or featured on dining tables, deserve special attention. These highly visible items represent your home's aesthetic and often include cherished pieces with personal significance. Preparing crystal for display requires not only brilliant polishing but also consideration of presentation, lighting, and ongoing maintenance.
Pre-Display Deep Clean: Before placing a crystal in permanent displays, ensure pieces receive thorough cleaning and polishing. Even new pieces may have manufacturing residue, warehouse dust, or shipping film that dulls their appearance. Follow the complete cleaning and polishing process outlined earlier, ensuring each piece achieves pristine clarity before installation.
Strategic Lighting Enhancement: Crystal's brilliance depends heavily on lighting. Before finalizing display arrangements, experiment with lighting angles and intensities. Display cabinet lighting should angle toward the crystal rather than behind it backlighting creates silhouettes, while front or side lighting creates the sparkle and refraction that makes crystal captivating. LED strip lights or small puck lights positioned above or beside shelves work beautifully, creating drama without heat that could damage the crystal.
Natural light enhances crystal magnificently but requires caution. Position displays where they'll catch natural light during peak entertainment hours (typically late afternoon and evening). However, avoid direct intense sunlight for extended periods, as UV exposure and heat can cause damage over time. Sheer curtains or strategic placement that receives indirect light prove ideal.
Dust Prevention Strategy: Display environments inevitably accumulate dust the enemy of crystal brilliance. Enclosed cabinets with glass doors provide excellent dust protection while maintaining visibility. For open displays, establish weekly or bi-weekly light dusting routines using clean, dry microfiber cloths. Gentle wiping before dust accumulates heavily prevents the need for frequent deep cleaning while maintaining continuous sparkle.
Rotation for Even Exposure: In displays with complex lighting or varied viewing angles, periodically rotate pieces to ensure even light exposure and wear patterns. This proves particularly important for collections where some pieces face light sources directly while others sit in relative shadow. Quarterly rotation ensures all pieces maintain comparable brilliance and prevents sun damage from affecting only certain positions.
Spacing for Visual Impact: Proper spacing between displayed pieces prevents visual clutter while allowing each item to catch and refract light independently. Crowded displays diminish individual pieces' impact and increase the risk of contact damage. Leave at least two to three inches between pieces; this breathing room enhances rather than diminishes the collection's overall presence.
Background Considerations: Crystal displays brilliantly against various backgrounds, but some enhance clarity more than others. Dark backgrounds, navy, deep green, charcoal make clear crystal pop dramatically through stark contrast. Mirrored backs double visual impact through reflection while enhancing light effects. White or neutral backgrounds showcase colored crystal beautifully while maintaining clean, sophisticated aesthetics. Choose backgrounds that complement rather than compete with your crystal.
Height Variation: Create dynamic displays by varying height. Use small risers, vintage books, or specialized display stands to create elevations that add visual interest while ensuring taller pieces don't hide shorter ones. This three-dimensional approach draws the eye through the display while maximizing each piece's visibility.
Thematic Grouping: Consider organizing displays thematically, stemware together, vases in another area, serving pieces elsewhere, or by color for collections featuring colored crystal. Cohesive groupings create stronger visual statements than random arrangements while making each piece's purpose and beauty more apparent.
Seasonal Refresh: Change displays seasonally to maintain visual interest and allow thorough cleaning of both crystal and display surfaces. This rotation prevents "display blindness" when permanent arrangements become invisible to daily observation. Seasonal changes also provide opportunities to feature pieces appropriate to the holiday crystal during winter, and light, airy pieces during summer.
Personal Story Integration: For pieces with personal significance, wedding gifts, personalized crystal featuring sand-etched photographs or messages, and heirloom treasures, incorporate small descriptive cards or labels. These additions transform displays from mere decoration into storytelling installations that invite guests to engage with the memories and meanings behind your collection.
Maintenance Schedule: Establish regular maintenance routines for the displayed crystal. Monthly, remove pieces for thorough polishing using the methods detailed throughout this guide. Annually, remove everything for comprehensive cleaning of both crystal and display surfaces. This systematic care maintains continuous brilliance while preventing buildup that would require intensive restoration.
Professional Display Consultation: For valuable collections or when designing elaborate display installations, consider consulting with professional designers or curators. Their expertise in lighting, spacing, and presentation can transform good displays into museum-quality exhibitions that honor your crystal's beauty while protecting its value.
Understanding how to polish crystal glassware for display ensures your pieces serve their dual purpose: functional beauty for use and aesthetic enhancement for appreciation, while maintaining the pristine clarity that justifies their prominent placement in your home.
Crystal House Care Insight
At Crystal House, our relationship with crystal transcends creating personalized masterpieces; it encompasses profound reverence for the material itself, deep understanding of proper care, and commitment to ensuring pieces we create remain brilliant for generations.
Since founding our craft in 1999, our artisans have worked intimately with the finest crystal available, mastering the signature sand-etched engraving process that defines our work. This daily interaction with premium crystal has taught us not merely how to shape and engrave it but how to protect, preserve, and polish it for enduring beauty. The precision, patience, and attention to detail characterizing our engraving should equally characterize your approach to crystal care.
When we create personalized crystal pieces perhaps engraved with wedding photographs capturing the joy of your special day, heartfelt messages expressing emotions beyond words, or family heritage details connecting past to present, we're creating treasures meant to span generations. These pieces will witness countless celebrations, grace innumerable gatherings, and carry forward stories that define family legacy. This longevity becomes reality only through conscientious care that respects the crystal's nature while protecting its brilliant clarity.
The curated luxury collections we offer from world-renowned makers, Nambe's innovative American design, Kosta Boda's Swedish artistic vision, Vista Alegre's Portuguese heritage, and Orrefors' Scandinavian excellence represent pinnacles of crystal artistry. Each piece embodies master craftsmanship through hand-blown forms, intricate cuts, and innovative designs pushing material boundaries. Whether enhanced with our signature engraving or treasured in original form, these pieces deserve care matching the skill invested in their creation.
Our partnership with distinguished organizations like the U.S. Navy, creating commemorative pieces, recognition awards, and ceremonial gifts, reinforces our commitment to precision, durability, and lasting quality. When we engrave crystal honoring service members' achievements or marking institutional milestones, we understand these pieces must maintain clarity and beauty for decades. This same standard should guide your care of all crystals, regardless of origin or purpose.
We encourage viewing crystal polishing as an extension of the appreciation drawing you to these pieces originally. The gentle swirl of cleaning solution, the patient polish that reveals brilliance, the careful attention ensuring each piece achieves its full potential, these small rituals deepen connection with objects gracing your home and elevating life's special moments.
Remember that quality crystal, properly maintained, transcends passing trends and fleeting fashions. The stemware you polish today may toast your grandchildren's achievements decades hence. The vase you carefully maintain may hold flowers at family celebrations spanning generations. The personalized pieces preserving today's precious memories may become tomorrow's cherished heirlooms, their engraved images and messages connecting future generations to your story.
This permanence exists within the crystal's molecular structure its remarkable durability, chemical stability, and timeless aesthetic appeal. However, inherent longevity manifests only through care respecting material characteristics while protecting against limited factors that can damage the crystal. Proper polishing represents essential stewardship ensuring your crystal fulfills its promise of beauty spanning generations.
Should your crystal ever require professional assessment, restoration, or specialized care beyond home capabilities, we encourage seeking expert assistance. Certain challenges significant damage, exceptionally valuable pieces, and items with irreplaceable sentimental significance, merit professional expertise. Knowing when to seek specialized help represents wisdom in crystal stewardship, not admission of inadequacy. Preserving what matters most sometimes requires acknowledging when challenges exceed home remediation.
Conclusion
Learning how to polish crystal glassware properly transforms routine maintenance into an art form, protecting luminous beauty while honoring the craftsmanship, memories, and emotional significance these pieces embody. The methods we've explored, from gentle pre-cleaning through specialized techniques for etched designs and vintage pieces, provide comprehensive care solutions respecting crystal's delicate nature while achieving the spectacular clarity that defines premium pieces.
Whether employing vinegar's natural polishing power, microfiber cloths' gentle effectiveness, steam's cleaning capability, or patient hand-polishing's time-honored results, each approach honors crystal's unique properties while revealing the brilliant transparency and captivating sparkle that make these pieces so treasured. Remember that consistent gentle care proves more valuable than periodic intensive intervention, regular light polishing maintains continuous brilliance while preventing accumulation, requiring aggressive restoration.
Your crystal glassware, whether contemporary pieces from our curated collections or treasured vintage heirlooms, deserves care matching the artistry of its creation. At Crystal House, we've devoted more than two decades to perfecting crystal artistry through our deep, sculpted sand-etched engravings, and we recognize that preserving beauty requires the same dedication as creating it.
The time you invest in proper polishing ensures your crystal continues fulfilling its dual purpose, serving practical functions that enhance everyday moments while standing as luminous art, elevating your space. Each carefully polished piece stands ready to capture light, create prismatic beauty, spark conversations, preserve memories, and bring timeless elegance to the moments making life rich and meaningful.
May each brilliantly polished crystal piece remind you that exceptional objects, when treated with knowledge and respect, become cherished companions across generations, bearing witness to celebrations, marking milestones, preserving stories, and illuminating the beauty possible when craftsmanship, care, and appreciation unite in honoring what truly matters.